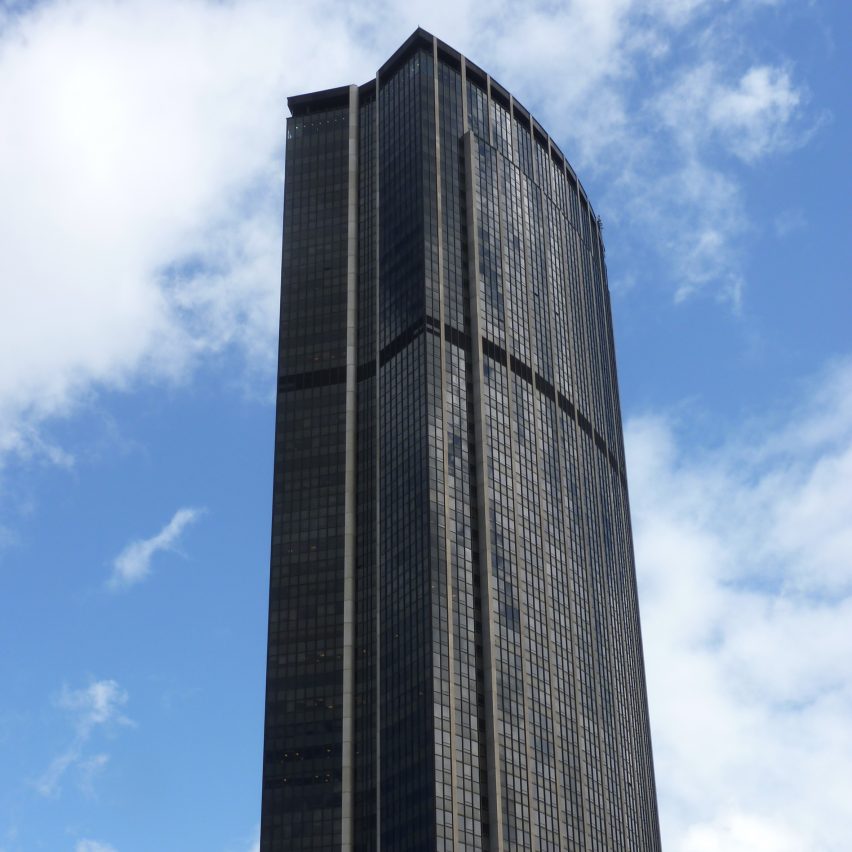
OMA, MAD and Studio Gang are among seven teams vying to overhaul Paris’ Tour Montparnasse – a 209-metre tower that caused such uproar on completion that it sparked a 42-year skyscraper ban in the city. Read more
OMA, MAD and Studio Gang are among seven teams vying to overhaul Paris’ Tour Montparnasse – a 209-metre tower that caused such uproar on completion that it sparked a 42-year skyscraper ban in the city. Read more
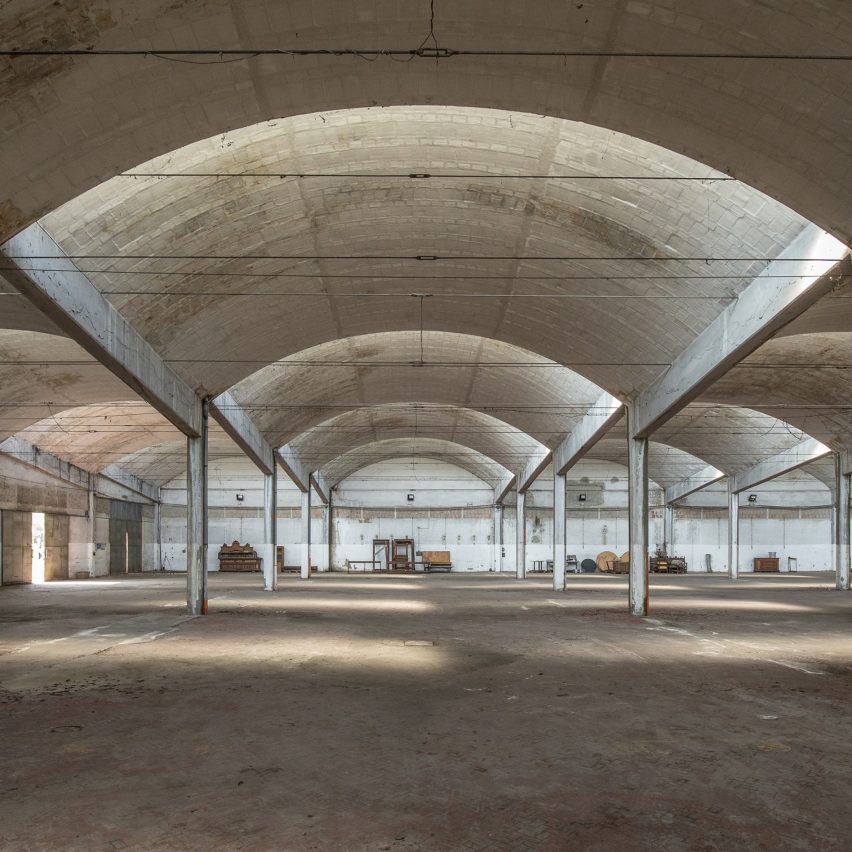
Dezeen promotion: entries are now open for architects and designers to submit ideas to transform a 16th-century Italian villa into a beer brewery. Read more

Multimedia designer Lara Défayes has designed a three-piece survival kit to help with the uniquely contemporary condition known as FOMO. Read more

The ambition was to create a modern and vibrant office space that would stand apart from its competitors by offering a compelling signature design and embracing recent changes in work culture.
The design explores the blurring of the boundaries of what constitutes typical office space by offering extensive work and social space outside tenancies in the form of the 750sqm atrium, shared leisure facilities and roof terraces. The atrium is envisioned to be a fully active space not merely an entrance route or waiting room. To ensure this a series of interventions at ground level have been installed to encourage a range of activities and uses. These include a 5m long kitchen table, a panelled library area, a fitted cafe and patisserie, meeting tables and soft furnishing.
Cycling is seen as key part of modern urban living and encouraged through the creation of a large cycle store at lower ground level offering spaces for 250 bikes and adjacent changing rooms and lockers. Access to the cycle store is direct from street level via a new ramp that descends to the lower level. Glazed openings separate the ramp from the atrium allowing views of passing cyclists descending through the building that further animate the space.
The design re-modelled the existing roof scape which clashed with the historic roof elements. In their place a new level of office space and roof terraces has been created. Materials have been selected to compliment the existing and large glazed openings created to frame the views over the city.
The design embraces the complexities and eccentricities inherent in the existing building rather then trying to overcome them. Exposed masonry, varying ceiling levels and level changes in floors are celebrated rather then hidden with finishes. Existing features that were previously inaccessible such as the buildings two towers have been opened up to create idiosyncratic meeting spaces.
Product Description.The polished concrete effect atrium floor finish is Solacir by Grace and was installed by Floored Genius Ltd. The this resin finish provided the look we were after whilst also working well over the a varying depth of screed due to the uneven historical floor slabs

The Arcade Providence is 188 years old, but it’s getting its second wind.
This classical Greek structure, which also happens to be America’s oldest shopping mall, was renovated into 48 micro-apartments and an assortment of businesses. Northeast Collaborative Architects, who led the redesign, converted the top two floors into apartments and bottom floor into commercial space. As single people increasingly contribute to a large percentage of the population, micro-apartments have proliferated as a housing solution.
Originally designed by Russell Warren and James Bucklin in 1828, the Arcade Providence is almost a monument with its grandiose columns and stone walls. Destined for closure in 2008, preservationists — who declared it a National Landmark in 1976 — fought for its revival. Now, after a 10 million dollar makeover, a whopping 4,000 people remain on the building rental’s wait-list.
The architects confronted the building’s antiquated infrastructure by laying down flat rocks and building atop those. The glass-gabled central atrium, which provides a golden, sunlit aesthetic, is reserved for small bars and restaurants. Each furnished micro-space includes an elevated bed, table, sofa, and TV. Kitchens are comprised of a dishwasher, microwave, and mini-fridge.
Arcade Providence is located in the heart of downtown Providence, so it’s close enough to restaurants and Providence nightlife.
News via: Business Inside
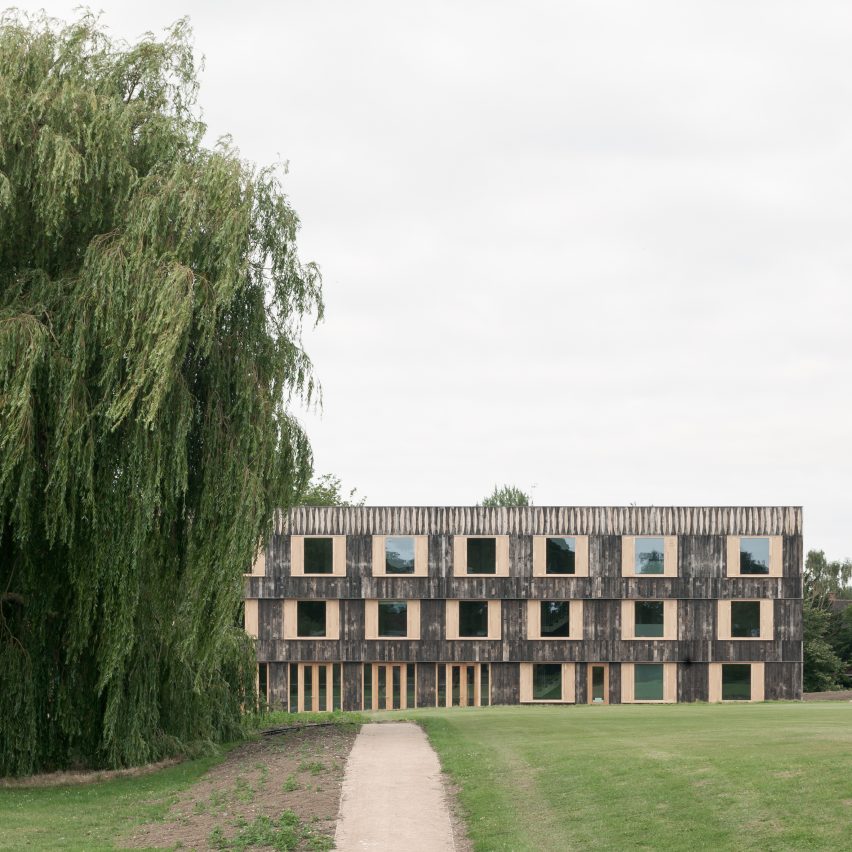
London studio 6a Architects designed these student halls at the University of Cambridge’s Churchill College to pay homage to the “picturesque Brutalism” of the original 1960s campus architecture. Read more
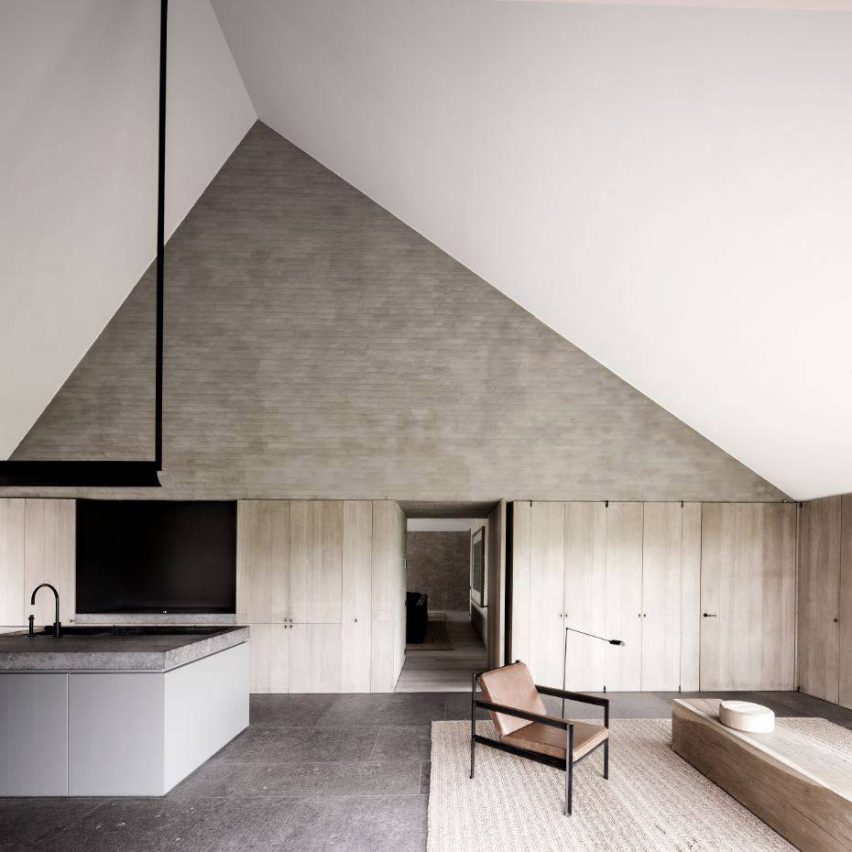
Biennale Interieur 2016: to celebrate Vincent Van Duysen being named Designer of the Year at Biennale Interieur, we’ve rounded up seven standout projects from the architect and designer admired for his minimalist style. Read more

Macros are one of the easiest ways to Automate Revit. They let you get under the hood of your software and put it to work for you. Macros do not require any additional software other than Revit and are a great way for beginners to learn programming.
So what exactly is a macro? A macro is a user-created command that is coded using Revit’s API. Macros are run directly inside of Revit and are saved in the project file. Other applications, like MS Office, provide the ability to record macros directly from your actions on the screen. Unfortunately, Revit does not have this functionality. You must code your Revit macros directly.
Ready to write your first macro? As you’ll see, the process is very easy. Follow the steps below and you’ll be on your way to macro mastery.
Create a new project file. Click the Manage ribbon then click the Macro Manager icon. This will open the Macro Manager dialog.
Macros can reside in a project file or within the Revit application. Macros saved in the project file can be used by any user who opens that file. Macros saved in the application are saved to the user’s Revit configuration. These macros can be used on any model file but only by the user who created the macro.
Macros are organized in modules. When creating a macro in a new project file, you must first create a module. A module is simply a collection of macros. A single project file can contain several modules with each module having its own macros. Module names cannot contain spaces or special characters. To create a module, click the “Project 1” tab then click the Module button in the “Create” section. In the “Create a New Module” dialog box, title your module “MyFirstModule. You can write macros in C#, VB.Net, Python or Ruby. For this exercise, choose VB.Net as the module’s language. Click OK to create the module.
Once Revit has created the module, SharpDevelop will launch. SharpDevelop is an open-source development environment that is built into Revit for programming macros.
Now that you have a module, you can create a macro inside the module. Click the Macro button in the “Create” section of the Macro Manager dialog. In the “Create a New Macro” dialog, title your first macro “MyFirstMacro” and set the language to VB.NET. Click OK to create the macro.
Switch over to SharpDevelop. You’ll see the standard VB.NET code that is automatically generated when you create a new module. Toward the bottom you’ll see the starting code for “MyFirstMacro”. Your first macro is simply going to popup a message box in Revit. It only takes one line of code. After the “public void MyFirstMacro()”, type the following between the brackets:
Once you’ve typed the code, you’re ready to compile or “build” the macro. All macros must be built before Revit can run them. In the SharpDevelop menu bar, select “Build” then “Build Solution”.
SharpDevelop will compile your VB.NET code into the .Net intermediate code. Any errors or warning will show up in the Errors and Warning window located at the bottom of the SharpDevelop interface.
If you have an error, double-check your code. The code window will list errors by line number so they are easy to pinpoint.
If your macro compiled correctly, go back to Revit and open the Macro Manager dialog (Manage > Macro Manager). You should see “MyFirstMacro” in the list below “MyFirstModule”.
Select “MyFirstMacro” from the list then click the Run button. This will execute your macro. You should see the following on your screen:
You did it! You wrote your first Revit macro.
To take this further, you can modify the code to report back something more useful. Change your code to the following:
The “Me.Application.ActiveUIDocument” object represents the current model file. The “Document” object contains data pertaining to the current file itself. To see the active view in the current project file, change “Document.PathName” to “ActiveView.Name”. Note the underscore (“_”) character in the code above. This character represents a line continuation symbol. This tells SharpDevelop that the code continues in the line below. Line continuation symbols are used when printing long lines of code to a page. When you are typing the code, you can omit the “_” and type the code on a single line.
Our first macro was useful for illustrating the process for creating a macro but let’s take what we just learned and put it to use on a macro that is more useful.The following code deletes unused views in the current model file. If a view is not on a sheet, it is deleted. Note this macro does not work with dependent views. To test out your new macro coding skills, create a new macro and type the following code:
After typing the code, go to Build > Build Solution to compile it. You may get an error or two, that’s normal. Use the steps outlined in the troubleshooting section above and try to resolve the errors. Check for typos in your code – that’s what usually gets me! Once the code builds successfully, switch over to Revit and run the macro.
Congratulations! You’re on your way to Revit macro mastery! While this tutorial is very basic, it illustrates the principles of writing Revit macros. For a next step, I recommend downloading and installing the Revit 2017 Software Development Kit or SDK. The SDK contains help files and sample code that will assist you as you learn to program macros. The Revit 2017 SDK be installed from the main page of the Revit installer or it can bedownloaded from the Autodesk Developer Network website. The SDK will install on your hard drive and create a bunch of subfolders and files. Take some time to review the files. The macro samples are particularly useful as you get started creating your own macros.
Learning to write macros and automate Revit will drastically improve your efficiency. A well-written macro can do more in five minutes than a regular user can accomplish in one hour. Learning to program takes time and patience. Start small and work systematically. You’ll be on your way to macro mastery in no time!
Exclusive Bonus! Click here to download an enhanced detailed PDF version of this tutorial along with a list of resources to help you write your own time-saving Revit macros

Museums are benefitting from the decline of long-form print journalism according to Design Museum director Deyan Sudjic, who spoke to Dezeen’s Marcus Fairs in this talk we filmed for Molteni&C. Read more

Five Houses is a residential project completed by Weber Arquitectos in 2015. It is located in Avandaro, Valle de Bravo, México. Five Houses by Weber Arquitectos: “The project Five Houses proposes to realize the dream of living in a forest dominated by ancient pines and lush vegetation, in a privileged place. The site is located 3 minutes from the junction of the new Toluca – Avándaro road, which includes a..
