At the 2016 Venice Biennale, Peter Zumthor has put his designs for the Los Angeles County Museum of Art (LACMA) on display for the professional community. Inside the Arsenale building, a model of the tar-pit-inspired building has been suspended to float within a curving display of textile artworks by Christina Kim, while a soundtrack by Walter De Maria – “Ocean Music,” written in 1968 – provides a rhythmic backdrop for the installation.
Continue for more on the exhibit, featuring images by photographer Danica O. Kus.
Rather than bring along artwork from LACMA to exhibit alongside the model, Zumthor and LACMA director Peter Govan selected artist Kim to create a textile artwork consisting of two curving rows of fabrics in a gradient of colors. The fabrics are picked up in the reflection of the model’s continuous glazed wall, where they serve as an abstraction of how the collection of paintings and artworks will contrast with the museum’s dark gray concrete shell.
Kim has previously worked with both LACMA and architectural themes as a participant in Wear LACMA, in which Los Angeles-based designers were tapped by the museum to create pieces inspired by LACMA’s permanent collection. Kim’s label Dosa created a 10-piece collection inspired by paintings of Simon Rodia’s Watts Towers.
The Arsenale exhibit also contains a small set of site plans and architectural drawings of Zumthor’s design, as well as a calming presence in the form of a bamboo garden.
Other images (including a photograph of the museum’s section drawing) can be seen here. A review of the display by LA Times Architecture critic Christopher Hawthorne can be found here.
In very small businesses, when you’re marketing your business, you’re really marketing yourself. Here’s advice for getting better at selling yourself and your business.
Casa Candelaria, Located at the outsides of San Miguel de Allende, Mexico, was conceived under concepts that detonate the strength in it presence and belonging to the place where it uproots, for which it was decided to return to the program of the Mexican haciendas and solve the new house around courtyards which themselves contain an activity that represents the tension and the relationship between the functions of the volumes that surround it.
Another key intention for the design development was the decision to use as constructive method rammed earth walls, with natural aggregates that allows the earth to become black toned that seeks the integration and mimicry with the environment where it was intended that the main element outside was the vegetation.
Floor Plan
As for the benefits that the use of rammed earth gives us, is the thermal storage because of the thickness of 50cm, in a place of extreme weather, as San Miguel de Allende, it´s sought to achieve spaces that during the day could stay fresh and at night preserve the thermal gain they achieve during the day and radiate it into the interior, in order to create warm spaces. This strategy along with saving on the purchase and transfer of materials from distant places, make the construction time, cost and functional outcome to optimize in the best way possible.
Volumetrically the house solves each of the areas independently, creating blocks of black soil with predominance of solid and opening to the nature that surrounds the volumes through gaps that arise from floor to a 2.44m height where privacy and control of light is given by wooden blinds, revolving plates that generate an aperture and a total integration with the outdoor space.
Programmatically the project uproots in an area of 4 hectares and consists of a master house, the big house, another smaller houses, the guest house, a club house, the caretaker’s house and a jogging track 1km long that unites and represents all the project itself, giving way along its route activities, contemplation and transit between the volumes that make up the hole house.
The big house consists of 12 volumes that are organized around 2 large courtyards, dividing public and private areas of the house with 930sqm and 630sqm of outdoor areas between patios, terraces, pool and gardens and two interior corridors that weave the total volumes outwards.
The guesthouse consists of 4 volumes connected by a covered courtyard and 200sqm of construction. The materials used in this project as key players are compacted soil walls, parota wood indoor and archaeological stone outdoor, accompanied lesser extent of concrete, blacksmithing and tile floors.
Buying insurance is an expensive but necessary purchase. Because the rates are often high for good insurance coverage, it can be tempting to purchase it directly from the insurance company, skipping the middleman insurance broker. However, insurance brokers will tell you it’s best to make use of their services.
What do insurance brokers do? Why is it better to have one? Read on and find out.
1. Brokers will help assess insurance needs
Customers purchasing insurance have different types of properties and different coverage needs. Whether the insurance is for a property, vehicle, business or other piece of personal property, there are a lot of variables in buying insurance.
While these options are available to any potential buyers online or in hard copy, it can take a lot of time and effort to sift through all of the possibilities with little prior experience. This is where a broker can assist.
Not only are brokers knowledgeable about policies, coverage and exceptions, but they are also much faster at pointing customers in the direction that is best suited to their needs. Customers who need special services or unique changes to their policies often find that brokers are able to make these adjustments much more quickly and easily than the customers attempting to directly contact the insurance companies.
2. Brokers will obtain quotes and policy comparisons
Along with finding the right insurance plans, brokers are able to quickly and easily get quotes and make policy comparisons. Direct customers are able to make similar appraisals, but they often do not have the same software access that provides clear associations. Brokers are also sometimes able to find ways to combine different types of insurance to provide comprehensive coverage for reduced rates.
In addition, the quotes that brokers are able to offer may be significantly lower than the direct sales cost. Brokers are typically provided with special pricing by insurance companies because the companies trust the brokers.
Professionally trained brokers will properly insure their customers, helping the insurance save money by avoiding unnecessary claims. This savings is then passed on to the customers through the brokers’ quotes.
3. Brokers will explain terms, conditions and the fine print
Insurance policies can be difficult to understand. There are typically many pages of terms and conditions, often followed by exceptions and exclusions. A customer who purchases any plan will have access to that policy’s terms.
However, sometimes it becomes necessary to get assistance in understanding all the legal language. An insurance broker is trained to read these documents and explain them in everyday words that make the conditions clear to all customers. These clarifications can help customers prevent filing incorrect claims and avoid misunderstanding coverage.
4. Brokers can make policy changes as needed
Life situations can require unexpected changes in insurance coverage. For example, an insurance customer might buy a new house, change marital status or sell a car. A direct sales customer can make these adjustments himself or herself by contacting the insurance’s customer service department but this can often require time on telephone hold and frustration from the customer.
In contrast, a broker is able to handle the headaches that often come from making these changes on behalf of the customer.
5. Brokers can provide assistance during a claim or settlement
When it comes time to file an insurance claim or to face a settlement, brokers can be a bridge between the insurance company and the customer. Brokers act as the customer’s voice, making sure that the claims are handled quickly and fairly.
When customers have questions about how to proceed with the claim, the broker can answer them. All claims can be handled by the customer himself or herself, but the broker can be very helpful throughout the process.
Although many of these decisions can be handled directly by the customer, an insurance broker has the training to fully educate, answer questions and provide services in dealing with insurance companies and policies. While direct customers may stress over the details without anyone helping them through the process, brokers provide customers with the peace of mind of knowing that there is little risk with the broker’s assistance.
In addition, insurance brokers are able to provide a high level of security for personal data. They are tasked with remaining discreet and maintaining confidential files for all of their customers. Although direct sales through insurance companies are secure, working with a real-life person often feels safer than entering personal data into a computer or offering it over the telephone.
Many brokers will answer policy questions and offer quotes over the telephone, but it is typically better to speak to them face to face so that there are no forgotten details or misunderstandings. There are benefits to both methods of buying insurance. In the end, deciding whether or not to use an insurance broker is a personal and individual choice.
(function(d) {
var params =
{
id: “cb4f919c-04fa-460c-b2ff-2c7f9ecf4472”,
d: “ZHVtYmxpdHRsZW1hbi5jb20=”,
wid: “165294”,
cb: (new Date()).getTime()
};
var qs=[];
for(var key in params) qs.push(key+’=’+encodeURIComponent(params[key]));
var s = d.createElement(‘script’);s.type=’text/javascript’;s.async=true;
var p = ‘https:’ == document.location.protocol ? ‘https’ : ‘http’;
s.src = p + “://api.content.ad/Scripts/widget2.aspx?” + qs.join(‘&’);
d.getElementById(“contentad165294”).appendChild(s);
})(document);
Whooo is that? A baby Mexican spotted owl at Zion National Park in Utah! National parks aren’t just for people to enjoy – they also preserve important habitat for wildlife like the Mexican spotted owl, found in Zion’s slot canyons. It’s one of the largest owls in North America and is listed as a threatened species by both the U.S. and Mexican governments. Protecting parks helps ensure these owls have a home for years to come. Photo by Sarah Stio, National Park Service.
ArchDaily recently posted an interesting article on using animated GIFs for architectural drawings. The article had some great examples but was short on details of how to actually create these images.
I was curious how to create animated GIFs using Revit so I looked into the process. It turns out it’s pretty easy, provided you’re systematic when creating your views and have access to photo-editing software, like PhotoShop. Want to try it yourself? Follow the steps below to create your own animated GIFs in Revit.
Step 1 – Create Views in Revit
Animated GIFs work best when you use a consistent view point and change something within the view, like the visibility of elements or the cutting plane of a section box. For this example, I’m going to change the cutting plane of a section box so my GIF will animate the the movement of the section through the building.
To start, I create the initial 3D view and turn on the section box. This is my starting view so I make sure the section box isn’t cutting the building. I name this view with a “_01” suffix. I also create a new 3D view template and add it to this view. I’ll use this template to control the visibility of the section box in all the animation views.
Courtesy of ArchSmarter
Once that’s done, I duplicate the view, move the section box into the building by about 20 feet and rename the view with an “02” suffix.
Courtesy of ArchSmarter
I continue this process of duplicating the view, moving the section box, and renaming the view until the section box has passed through the entire building.
Courtesy of ArchSmarter
Try to use at least 8 – 10 images. The more images, the smoother your animation.
Once I’ve created all the views, I edit my view template and turn off the section box.
Step 2 – Export Images
Now that you have all the images created, export them using the “Export Image” dialog. Go to the Revit button, select “Export” then choose “Images and Animations” and finally, “Image”. This will launch the “Export Image” dialog.
Courtesy of ArchSmarter
In the “Export Image” dialog, select the views to export in the “Export Range” section. I like to use PNG files so, in the “Format” section, I select PNG for “Shaded views” and “Non shaded views”. Also, set the image size for the images in the “Image Size” section. I like to use 600 pixels horizontal for animated GIFs.
Courtesy of ArchSmarter
Select the output folder then click “OK” to export the images.
Step 3 – Load Images into PhotoShop
Now that we have the image files for our animation, we need to put them in the GIF file and animate them. To do this, we’re going to use Photoshop. The first step is to load the individual image files as layers using the “Load Files into Stack” script. To access the script, go to File > Scripts > Load Files into Stack.
Courtesy of ArchSmarter
Each image will appear as an individual layer in the “Layers” dialog box, as shown below.
Courtesy of ArchSmarter
Step 4 – Open Timeline
Photoshop has a cool feature that lets you manipulate an image over time. We’re going to use this to create the animated GIF. To open the Timeline window, go to Window > Timeline. This will open the Timeline window at the bottom of your screen.
Courtesy of ArchSmarter
With the Timeline window open, click the “Create Frame Animation” button, as shown below. If you don’t see the “Create Frame Animation” button, don’t worry. Just skip to the next step below.
Courtesy of ArchSmarter
Once you’ve done that, click the menu button on the far right-hand side of the Timeline window and select “Make Frames from Layers”. This will import all the layers into the timeline.
Courtesy of ArchSmarter
The individual images that we imported as layers will make up the key frames of our animation as shown in the image below.
Courtesy of ArchSmarter
Step 5 – Set Animation Settings
Now that we have all the frames of our animation, we can specify the time interval between each frame as well as how many times the animation should repeat.
First, shift-click and highlight all the frames in the timeline. Once you have them all selected, click the “0 sec.” drop-down on one of the images and choose your interval. I like 0.5 seconds but you should experiment to see what works best for you.
Courtesy of ArchSmarter
Next, select how often the animation should repeat. I like my animated GIFs to loop continuously so I select the “Forever” option as shown in the image below.
Courtesy of ArchSmarter
To test your animation, click the “Play” button at the bottom of the Timeline window. This will cycle through all the images in your animation.
Step 6 – Export the GIF
Our animated GIF is all set. We just need to export the file. Go to File > Save for Web to open the “Save for Web” dialog.
Courtesy of ArchSmarter
In the “Save for Web” dialog, choose your GIF options. I typically select the “GIF 128 Dithered” preset at the top right-hand side of the dialog. You can also specify your final image size in the “Image Size” section.
Courtesy of ArchSmarter
Once everything looks good, click “Save” and specify the location where you want to save the file. That’s it!
Step 7 – View Your GIF
To view your GIF, drag the file into a web browser, like Chrome or Firefox. This will play the animation automatically.
If you want to step through the file manually, open the GIF in an image viewer like Windows Live Photo Gallery.
Here’s another animation of the same model:
Conclusion
Animated GIFs are a lightweight and easy way to create more dynamic architectural diagrams. Using the steps above, you can quickly express your design intent in a very compact format. If a picture is worth a thousand words, an animated GIF is worth at least a few dozen pictures, right?
How about you? Have you used animated GIFs on your website or in a presentation? If so, what methods have you used to create the diagrams? Leave a comment below!
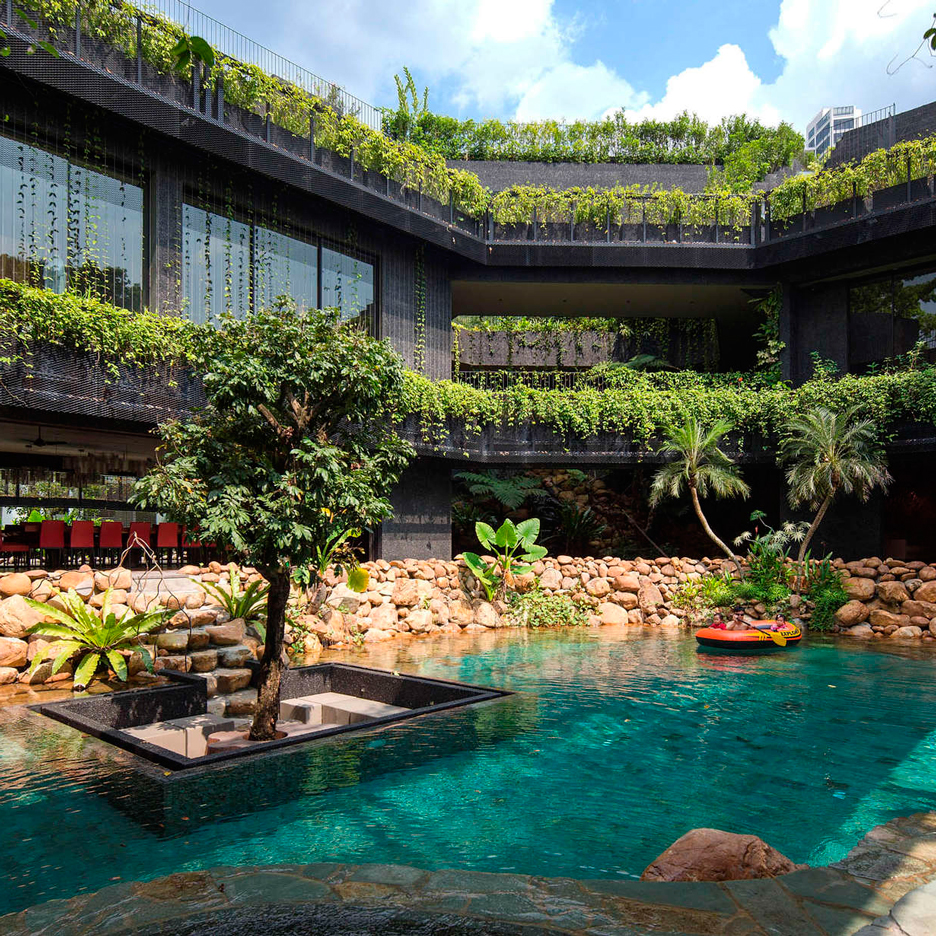
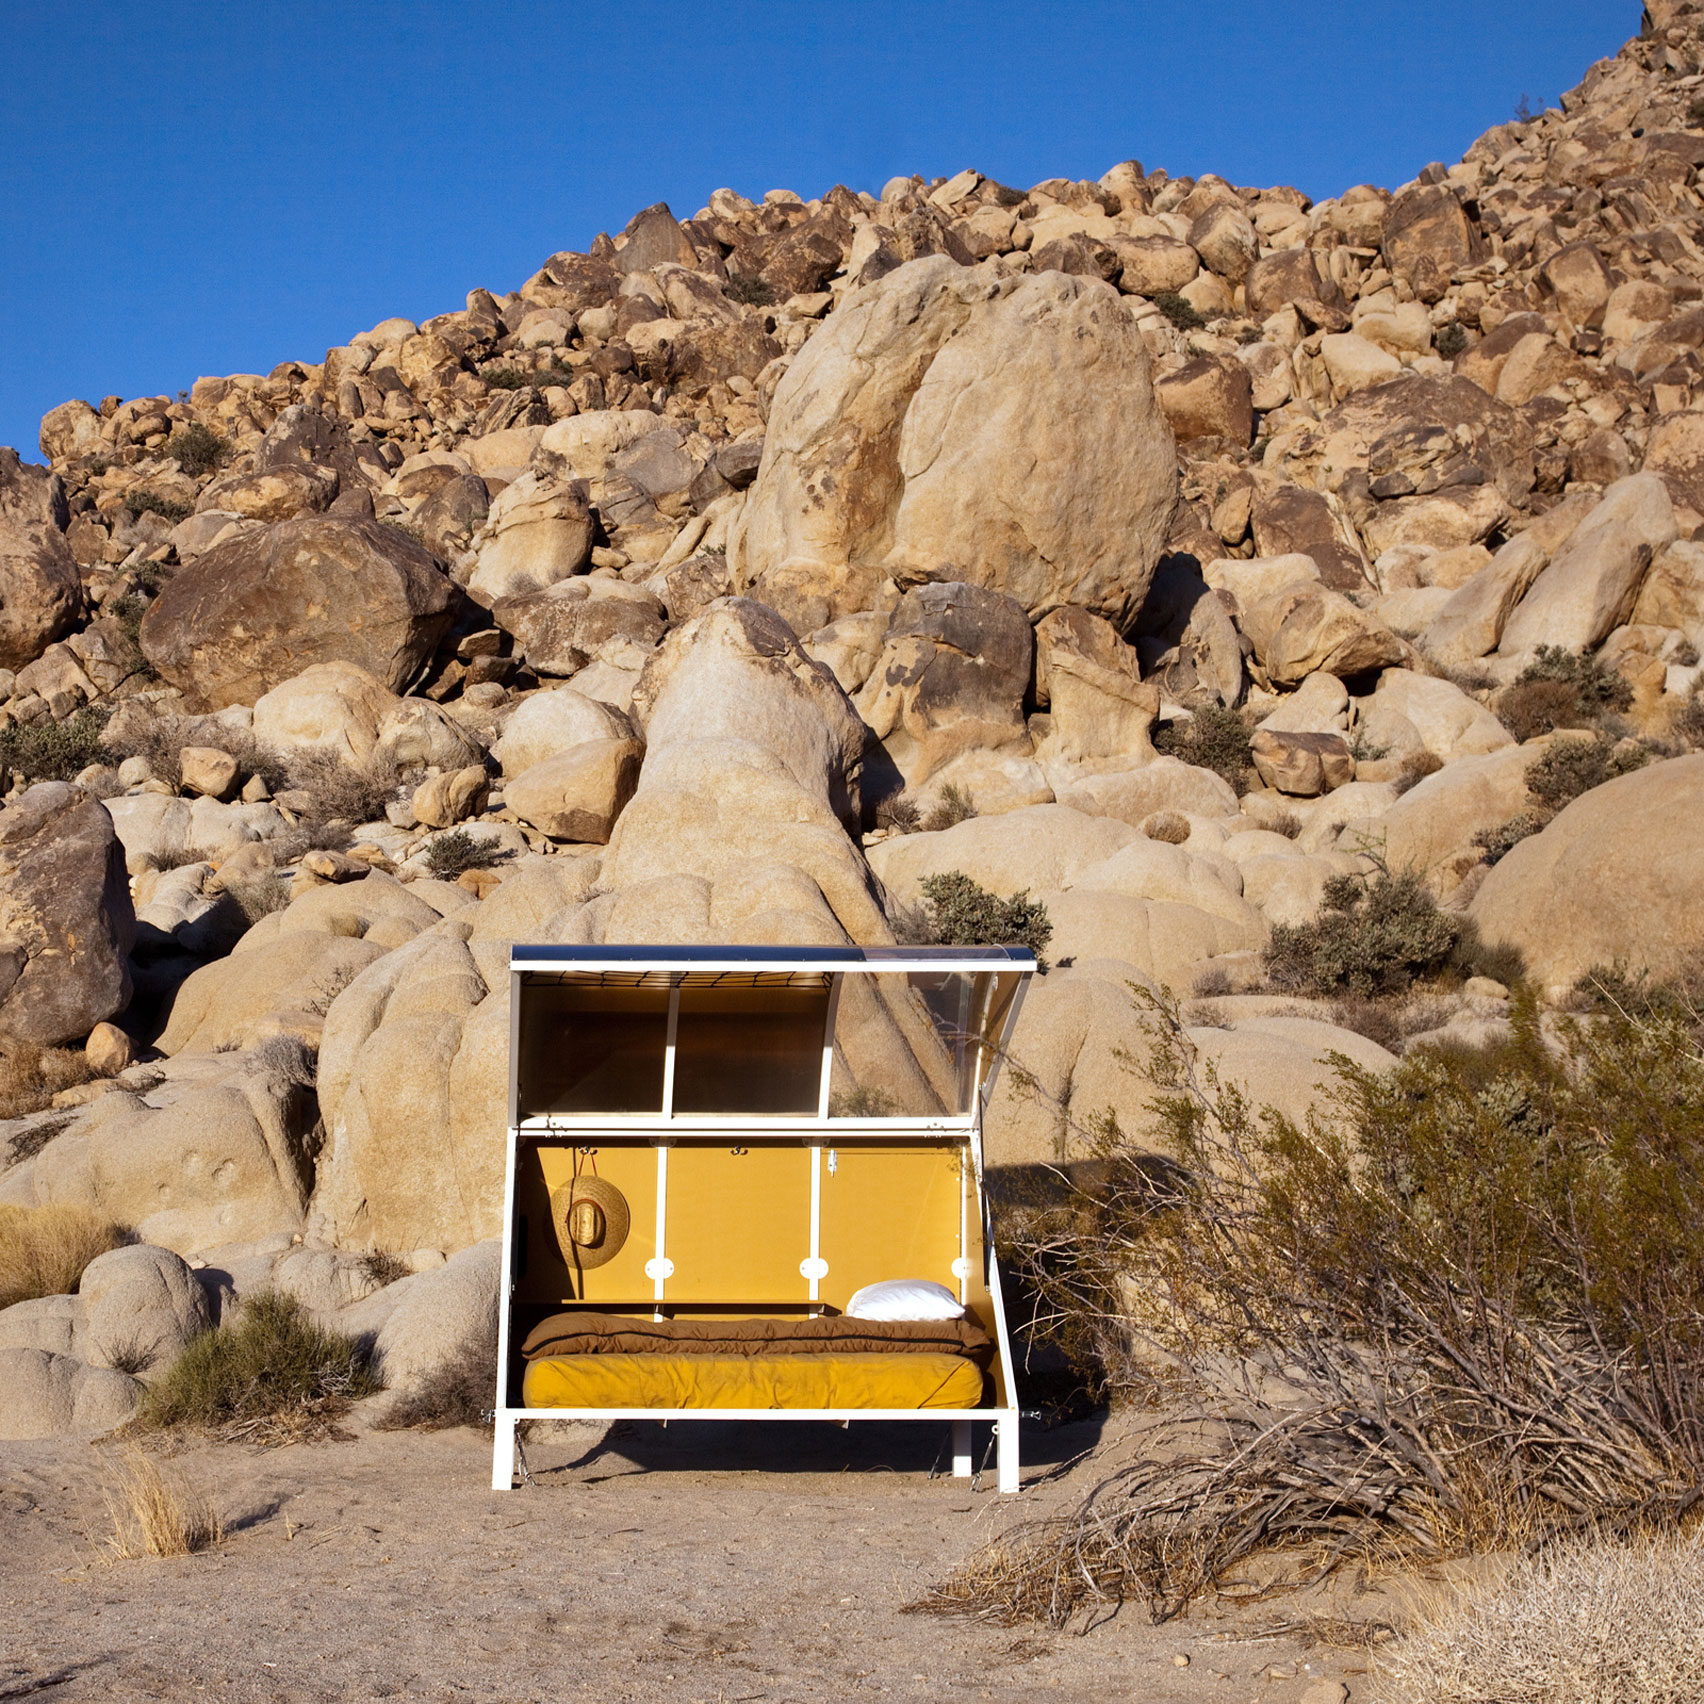
Love the great outdoors but not prepared to slum it in a tent? These micro cabins and sleeping pods provide more glamorous accommodation for holidaying in remote locations (+ slideshow). (more…)